How to Install Landscape Pavers : 5 Detailed Steps
In this article we provide a detailed 5 step guide on how to install landscape pavers. Pavers are an outstanding complement to any landscape design. Sometimes referred to as paver stones, there are many sizes, shapes, and colors that are sure to suit varied style and taste.
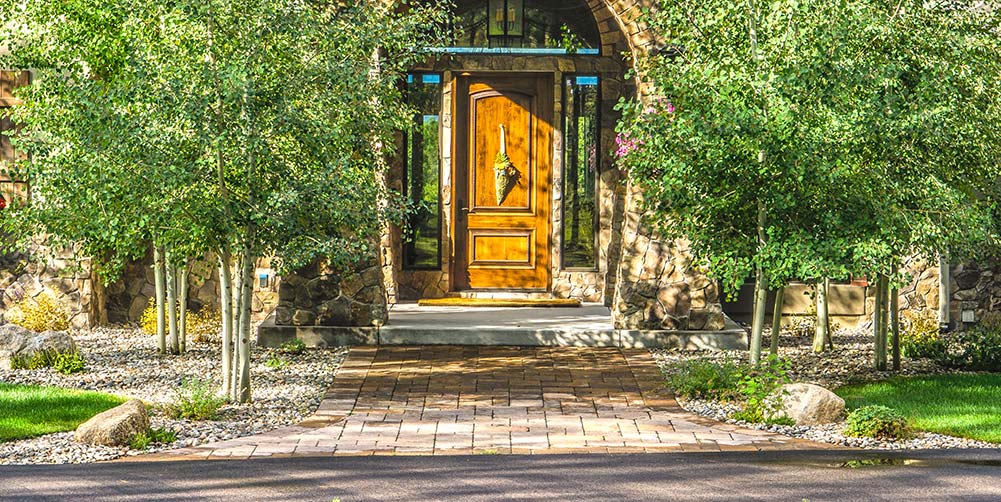
Why Landscape Pavers?
They can also turn what may have been an otherwise bland area, like a driveway, into a focal point of the landscape. Have a look at some examples of pavers being used in landscape design projects.
Another added benefit of landscape pavers is that, when installed correctly, they are extremely durable and hold up to Colorado’s weather conditions exceptionally well. Pavers will not crack like concrete, and if repairs are ever needed, the individual pavers are able to be removed and replaced or reset, unlike concrete, which requires cutting and removing larger sections.
How Landscape Pavers are Used
Pavers can be used for several landscape applications, including patios, pathways and driveways as well. While the pavers themselves are quite durable, their real strength is below the surface. Colorado Springs, along with the rest of the Front Range, experiences freeze thaw cycles that cause the ground to heave and settle, so it’s crucial to make sure the base preparation is done well. Continue reading to learn how to properly install pavers for your application.

How to Install Landscape Pavers in 5 Steps
It is crucial to understand how to install landscape pavers correctly. Here are 5 steps that go into great detail on how to install landscape pavers the right way.
Step #1: Set the Proper Elevation
The first step before installing pavers is to figure out your desired paver height. If you are meeting up with an existing fixture, such as a garage floor, that will be your finished elevation. If you are meeting up with a home or step, you’ll want to set your height to somewhere between 4 ½”- 7 ½” inches. If you’re starting at the bottom of steps, you’ll want your finished height to match the existing step height. Once you’ve figured out your starting height, you’ll need to figure out the height of the rest of your project. For any application, there will need to be a slight slope. This allows for any water to run off the pavers, rather than pooling.
A slope of ¼” per 1’, or 2%, allows for adequate drainage, and is still going to feel flat enough to enjoy as a patio. For driveways you will often have a greater slope than this between your garage slabs and drive apron. Walkways also often have a greater slope from start to finished, but because the slope is often not a uniform slope, it is a good idea to slope any walkway a ¼” per 1” side to side. If the path you would like to install pavers on feels too steep, incorporating stairs will help. Once you have your heights figured out, pound concrete stakes into the ground a foot or two outside your paver area and mark your desired heights on them. The easiest tool for this task is a transit laser level, and they are available to rent from a number of equipment rental businesses. Once you’ve figured out the finished height, you’ll need to figure out your bottom of base height.
For a patio or path, to find your bottom of base height you’ll need to find the thickness of the paver you’ve selected. Add to that 4” of base and ¾” of sand. The total of those three numbers is the distance you’ll need below the finished height you’ve previously marked on the concrete stakes. If you are installing a driveway, you’ll need to account for 12” of base.
Step #2: Set your Base
Chances are, you’re going to need to do at least some excavation to get down to the bottom of base height. You can tie strings to your marks, and measure down from there. Make sure to dig out 6”-12” beyond your hardscapes footprint. Once your excavation is complete, start by misting the area with a garden hose and tamping. You’ll want to use a heavy duty plate tamper for this, and they are also available from a number of local rental centers. For base, we recommend using ¾” minus road base, available from any local stone yard. Install and tamp the road base in 1” lifts. Make sure you are compacting your base 6”-12” beyond your finished space. You can figure out the finished height of the road base by taking your paver thickness and adding the ¾” of sand to that, then subtracting that from your finished height.
You will need to be sure the road base ends up at the correct height, and with a uniform slope. The finished base is what will determine how your project turns out, any dips, bumps or mismeasurements will show in the final product. You can figure out the finished height of the road base by taking your paver thickness and adding the ¾” of sand to that, then subtracting that from your finished height. One way to accomplish this is to set strings on your concrete stake an 1 ½” higher than the finished road base height and use a good straight 2”x4” board to finish the base off. The 2”x4” should be able to reach from string to string, and should just touch the screen without pushing it up.
Step #3: Setting the Sand
Congratulations, the hardest part is behind you. The next step is to set a layer of sand. We recommend concrete sand for this step, also available at any local stone yard. The layer of sand needs to be 1” thick. You might be wondering why we want 1” of sand, when all our measurements accounted for ¾” of sand. That’s because we are counting on ¼” of compaction in the sand layer once we tamp our pavers. A ¾” stick of PVC. will have an outside diameter of 1”. You can lay these out every few feet, dump your sand between them, and use a 2”x4” piece of lumber to screed it. As you finish an area, slide or lift the pipe, and carefully fill its void with sand and smooth it out. You will want to avoid stepping on the sand or compacting it in any way. If your paver space is large, it is advisable to sand a workable area, set your pavers, and then sand the next area.
Step #4: Installing the Pavers
You will need heavy duty paver edging (available at any local stone yard and large hardware stores). The edging needs to be nailed down with 12” timber spikes every 6”. If you plan on cutting your pavers, you can install the edging on top of the road base before you sand the area. Now you are ready to start laying your pavers. Just place them down, and make sure they butt up to each other. There is no need to pound or tamp them down. You can make sure you are keeping your joints straight by holding a tight string over them periodically. If you are ending your patio with whole pavers to avoid cutting, once you’ve installed them all, clear out the sand and install paver edging directly on top of the road base, tight against the pavers. If you have already edged, use the paver edging to mark your cuts. A heavy duty tile saw with a masonry blade is the tool you’ll need for cutting, and is readily available as a rental. Once you’ve got the pavers all set, it’s time to tamp them. If you are using a tumbled paver, you can tamp them without issue. If your pavers are not tumbled, you may want to consider using a rubber mat, an available option on many tampers, to help preserve the finish.
Step #5: Sand the Pavers
In the past, this step was often performed with regular sand, but we now have an improved material - polymeric sand, and it is highly recommended. It has binding agents that harden together, which improves it’s durability against weeds, ants, and rain. It also comes in a variety of colors. To sand the pavers, open a bag and spread it around, trying to work it into the cracks, then run a plate tamper over the area again. You’ll notice the tamper is working the sand down. Repeat until the joints remain full after tamping. The next step is to remove all the excess polymeric sand. After you’ve swept off the pavers, use a leaf blower to remove all the polymeric sand dust. The sand will stain your pavers if you don’t get it all removed. The final step is to follow the product’s directions to wet the sand down. All that’s left now is to enjoy.

While installing pavers can be an arduous task, learning how to install landscape pavers can pay off by increasing the value of your home and making the outside space more enjoyable and functional. By following the steps outlined above, you’ll ensure your outdoor space will also stand the test of time. If you have any questions, or would like additional information about pavers, please feel free to get in touch with us.